How To Draw A Teacher – Kawaii Style

Mofukawa is reader-supported. When you buy through links on our site, we may earn an affiliate commission. Learn more

Let’s learn how to draw a teacher – step by step kawaii style. A little while ago we showed you how to draw a student and received some really great feedback from that. Drawing a teacher will give you a chance to create some really cool classroom scenes using the student drawing combined with the teacher.

Our teacher tutorial will focus on the character itself, you can always add a chalkboard or anything else you think might look great with her.

In terms of difficulty, it’s fairly straight forward with a few details on the outfit and hair.

To help make this really easy to follow, we’ve made sure every step focuses on one detail at a time.

If you like what you see, don’t forget to check out our youtube channel and like/subscribe to help show support so we can keep providing more art lessons.

Contents

Art Supplies

Here’s a list of coloring supplies we recommend to use, however, feel free to use whatever you can find around the house!

If you are already a fan of a particular marker/coloring brand you may want to check out a few of our other guides such for popular brands such as Ohuhu markers, Artzea and Prismacolor markers.

Otherwise, just pick whatever coloring tools you have around the house (crayons, markers, pencil crayons etc.) and just have some fun!

A Few Tips Before You Start Drawing

  • Feel free to change colors of the outfit, hair and skin.
  • The hair and clothing details are the most complicated part of the drawing. Take your time and do each detail one by one.

Let’s Draw A Teacher – Step By Step

howtodrawakawaiiteacher-step1
Step 1: Make a wide U-shape as a starting guide for the teacher’s face. Note that the left tip is slightly higher than the right tip.
howtodrawakawaiiteacher-step2
Step 2: For the ears, draw two little curves on each tip. Add a little line in the inside for a detail.
howtodrawakawaiiteacher-step3
Step 3: Now, let’s work on the hair. Follow the arrows above to make different strokes. Make sure it touches the tips of the teacher’s face.
howtodrawakawaiiteacher-step4
Step 4: Now let’s draw the top part of her hair by making two slightly curved downward strokes on each side. Leave a little space in the middle (as seen). Add two curved strokes as well just below her ears.
howtodrawakawaiiteacher-step5
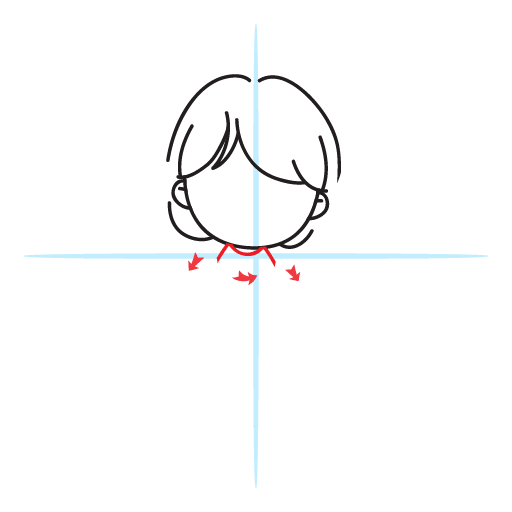
Step 5: Draw the collar/neck section with a small U-curve. Connect two short slanted lines downwards.
howtodrawakawaiiteacher-step6
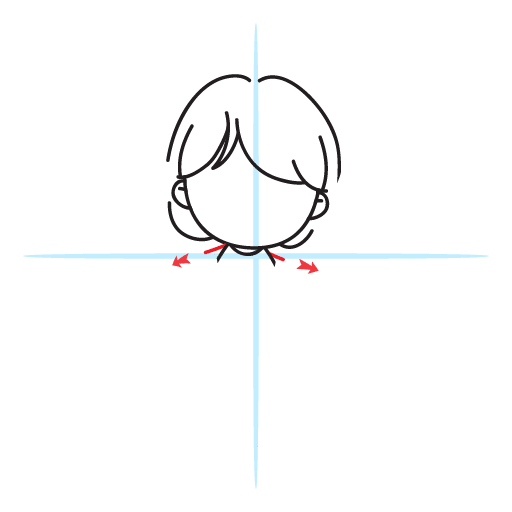
Step 6: Add two short outward lines on each side of her neck. Note that the one on the right should be placed in the middle of the line you made previously.
howtodrawakawaiiteacher-step7
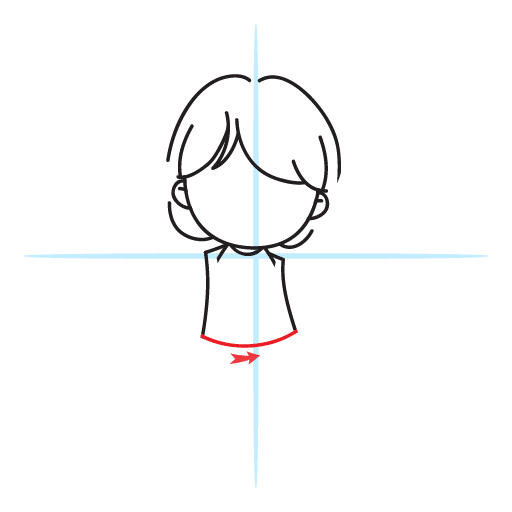
Step 7: On each side, draw a not-so-straight line downwards to start forming her body. See image above as guide.
howtodrawakawaiiteacher-step8
Step 8: Connect both ends with a slightly curved line to mark the waist.
howtodrawakawaiiteacher-step9
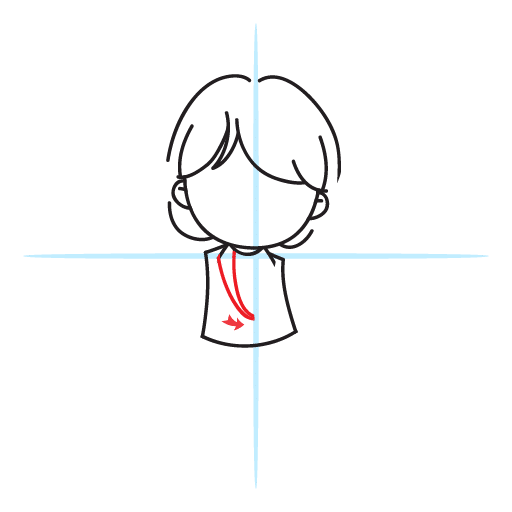
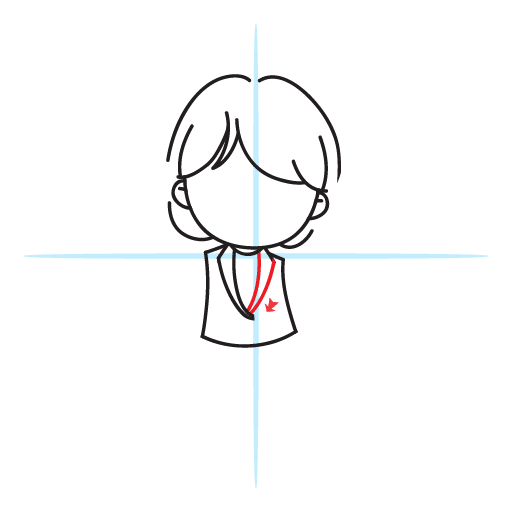
Step 9: Next step is to draw the left collar side of her suit. From the short lines above, make two downward strokes with both ends meeting a the middle point of her body. Leave a little space above the waist section.
howtodrawakawaiiteacher-step10
Step 10: Now do the same with the right collar section. Extend the two short lines from the shoulder downwards, still a little curved, and finish it just above the tip of the left collar’s end.
howtodrawakawaiiteacher-step11
Step 11: Draw the little necktie in the middle. Make a little oval shape from the neck then another longer oval shape with a pointy tip.

Don’t forget to add diagonal lines on each side of the small oval (touching the neck) as this is the collar of the teacher’s blouse inside.
howtodrawakawaiiteacher-step12
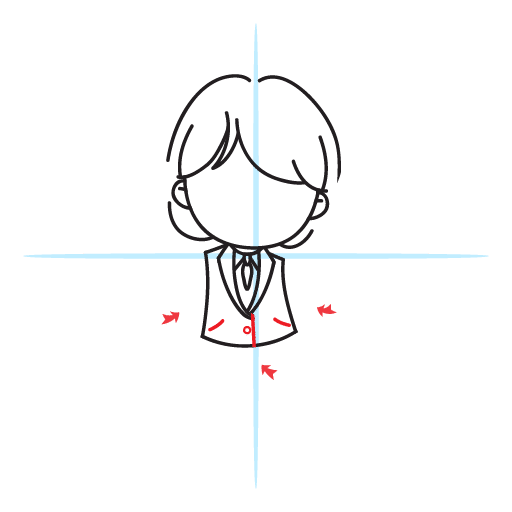
Step 12: Add diagonal strokes for the side pockets. Note that they are not very straight.

Make a line from the edge of the suit’s collar down to the waist. Add a circle on the left side for the button.
howtodrawakawaiiteacher-step13
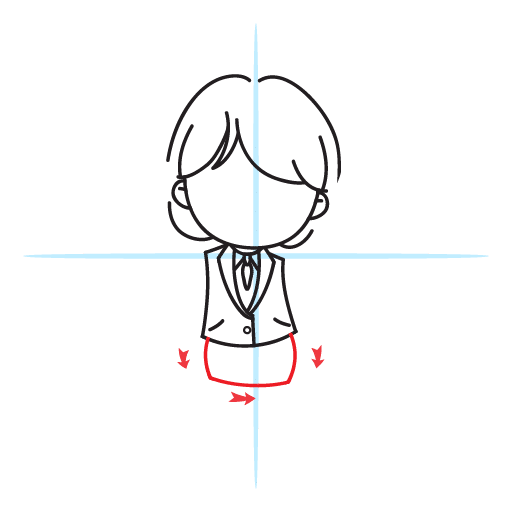
Step 13: Time to form the teacher’s skirt. Leave a little margin from the edge of the suit when you draw curved lines downwards on each side. Connect the edges with a slightly curved line.
howtodrawakawaiiteacher-step14
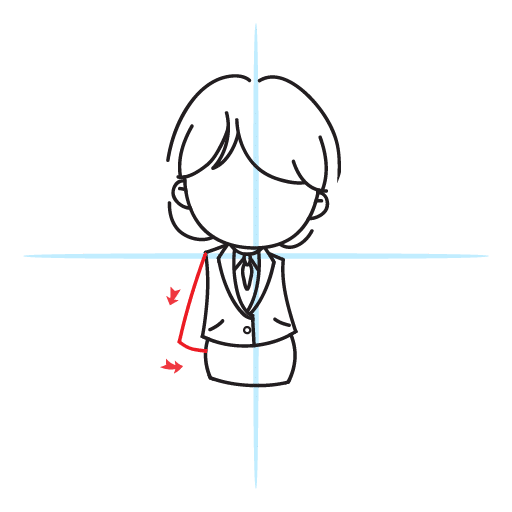
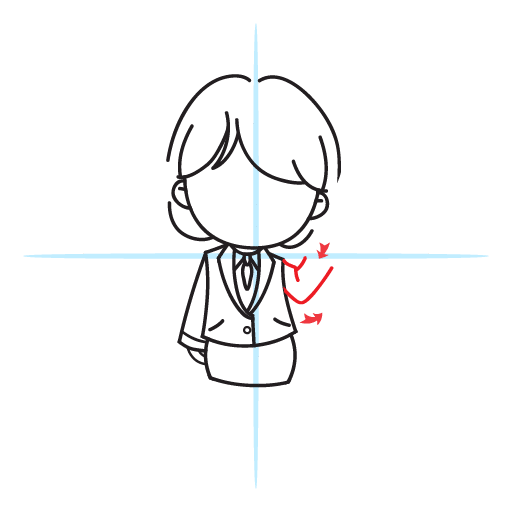
Step 14: Make the left sleeve of her suit. From the shoulder, draw a line downwards and connect it to her hips (with a little slanted line).
howtodrawakawaiiteacher-step15
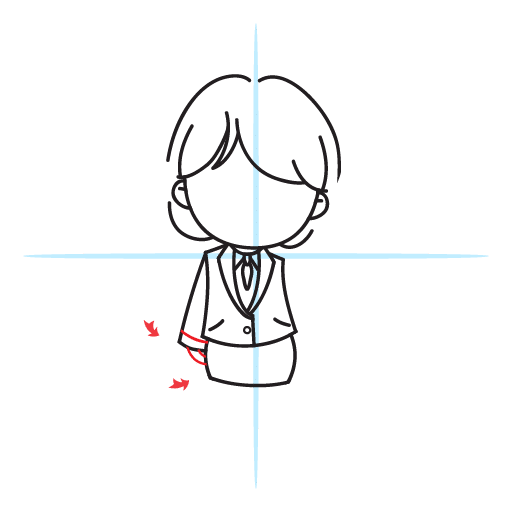
Step 15: Add details at the edge of the sleeve by drawing another line above.

Draw the teacher’s hand, too. Just make a big curve, followed by another smaller curve, from the edge of the sleeve to her hips.
howtodrawakawaiiteacher-step16
Step 16: Time to draw the right arm. It is raised up so follow the arrows to form the arms and elbows.
howtodrawakawaiiteacher-step17
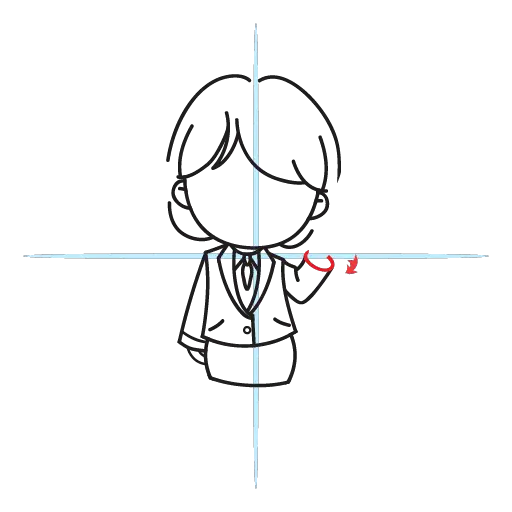
Step 17: Close the edge by an open round shape (we will use the space for the hands next).
howtodrawakawaiiteacher-step18
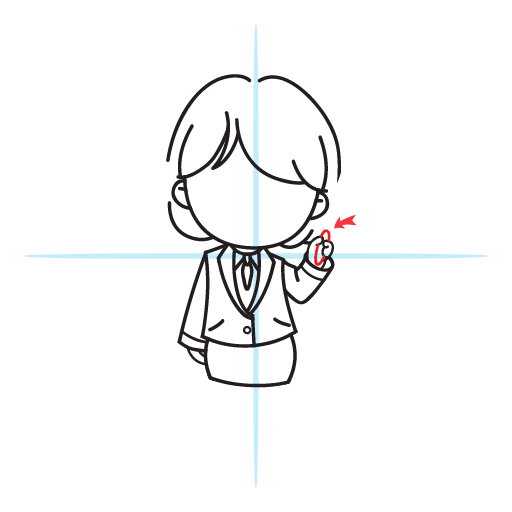
Step 18: Next to draw is the right hand. Make a curve from the sleeve and end it with an inward stroke (for one of the fingers).
howtodrawakawaiiteacher-step19
Step 19: Draw another finger beside it by making a swirl. It touches the first finger as well as the edge of her sleeve. See image as guide.
howtodrawakawaiiteacher-step20
Step 20: Make additional strokes to define her hand and fingers. Close the swirl with a C-shape and make a slightly vertical line to complete the hand.
howtodrawakawaiiteacher-step21
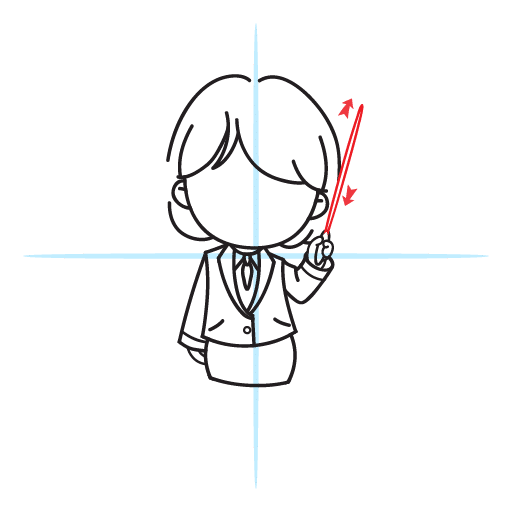
Step 21: Next is making the stick she’s holding. Draw an oval in between her fingers for the handle.
howtodrawakawaiiteacher-step22
Step 22: Draw two vertical lines with a pointy edge to complete the stick.
howtodrawakawaiiteacher-step23
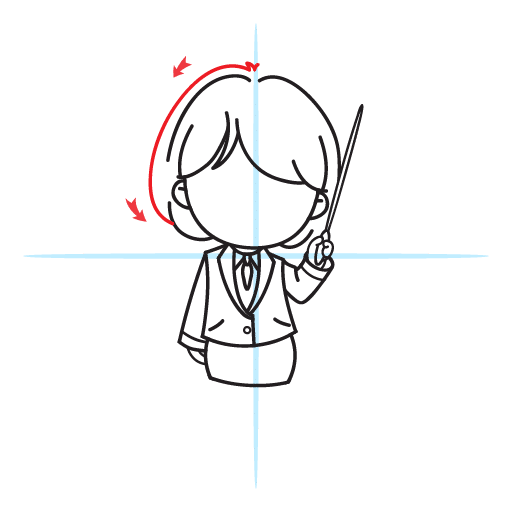
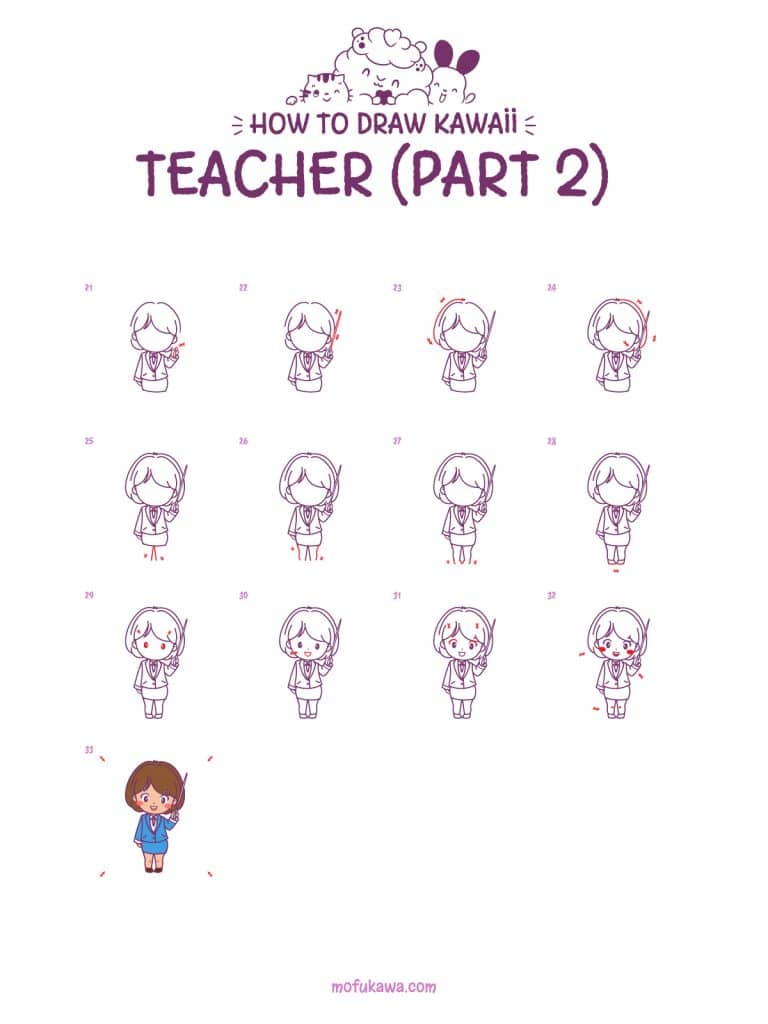
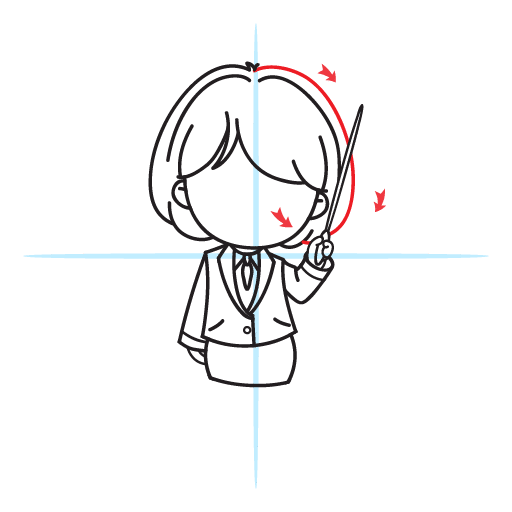
Step 23: Let’s go back to her hair to add volume. Let’s work on the left side first.

From the mid point above, draw a small wave-like stroke then extend it downwards, curved, until it touches the bottom curl under her ears.
howtodrawakawaiiteacher-step24
Step 24: Do the same on the right part of her hair. Draw a huge curve downwards until you reach her hair below her ears, too. Remember not to draw over the stick.
howtodrawakawaiiteacher-step25
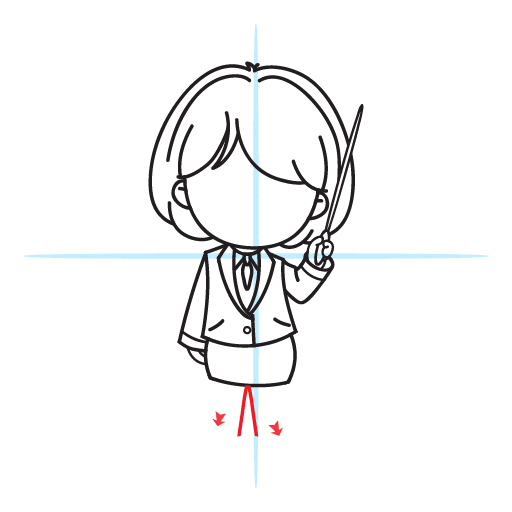
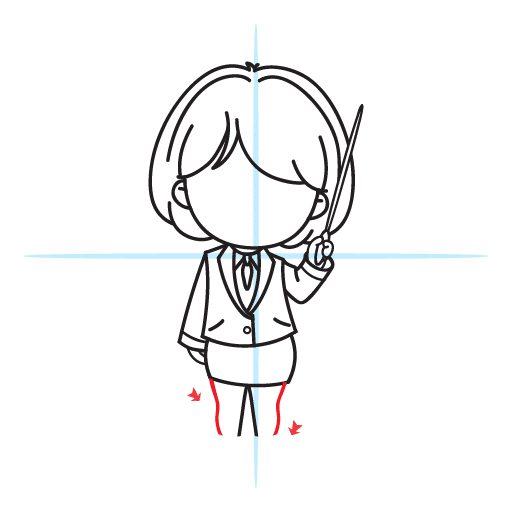
Step 25: Let’s start making her legs. Make a V-shape in the midsection of her skirt.
howtodrawakawaiiteacher-step26
Step 26: Draw the sides of each leg. Note the slight dent on the knee section.
howtodrawakawaiiteacher-step27
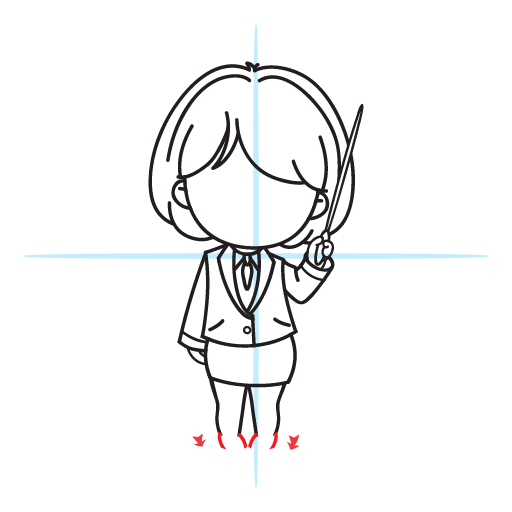
Step 27: For the feet, draw inward strokes as seen on the image guide above. Note that they are slightly curved, too.
howtodrawakawaiiteacher-step28
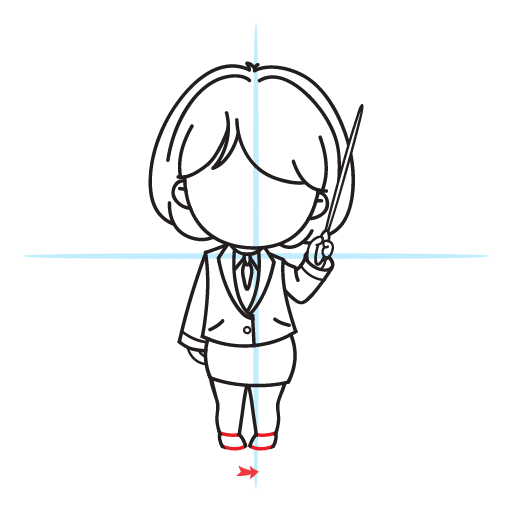
Step 28: Draw two lines on each foot to define the shoe section (as shown above).
howtodrawakawaiiteacher-step29
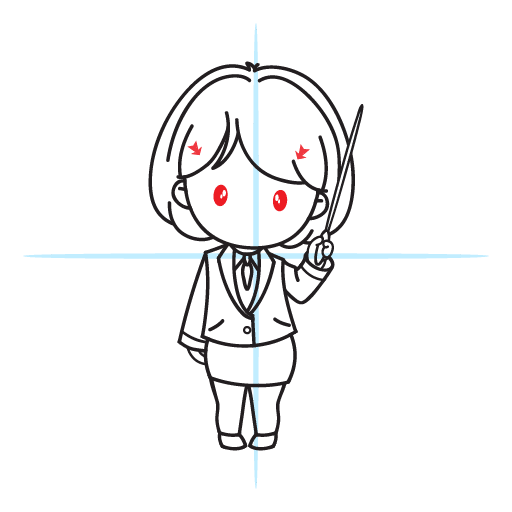
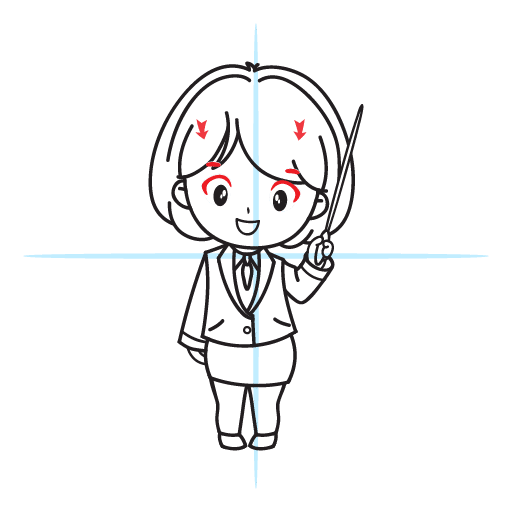
Step 29: Next is we go to the face and start drawing her eyes. Make small oval shapes with two white circles on each – one bigger than the other. You can shade the eyes black except for the two small circles inside.
howtodrawakawaiiteacher-step30
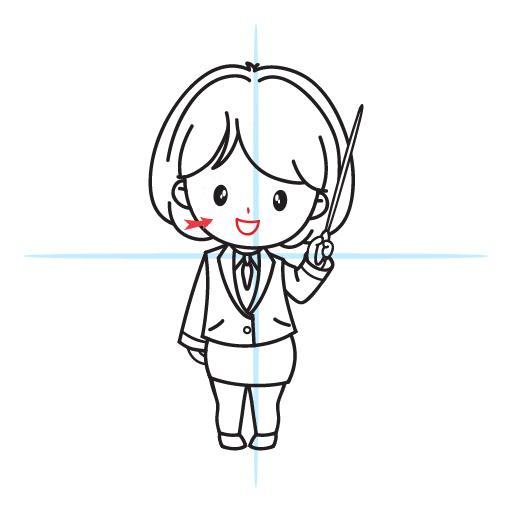
Step 30: Add a little stroke for her nose and wide semi-circle for her happy mouth.
howtodrawakawaiiteacher-step31
Step 31: Following the contour of her eyes, draw a thick arc. Don’t forget her eyebrows, too, which appears to be part of her hair. See the sample above for reference.
howtodrawakawaiiteacher-step32
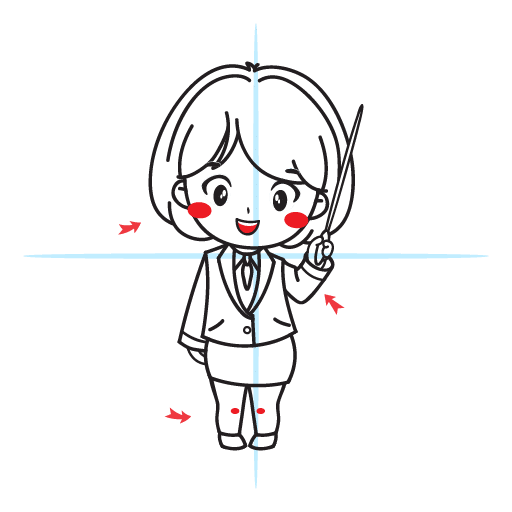
Step 32: Add a pink oval blush on her cheeks, just below the bottom sides of her eyes. You may also color the bottom portion of her mouth with the same shade.
howtodrawakawaiiteacher-step33
Step 33: Coloring time! You may choose whatever shade you like!

This is a pretty long tutorial so here’s a pat on the back! You did well!

Want More?

We are constantly adding more tutorials on how to draw kawaii characters and objects. Great for beginners and more advanced artists. We also have printable step by step instruction guides that will help, even brand new artists, re-create and improve on our drawings!

How about coloring instead? We have printable cute coloring pages so you can practice color techniques or just to have fun. Head on over to our coloring page section of our website to search and download them all!

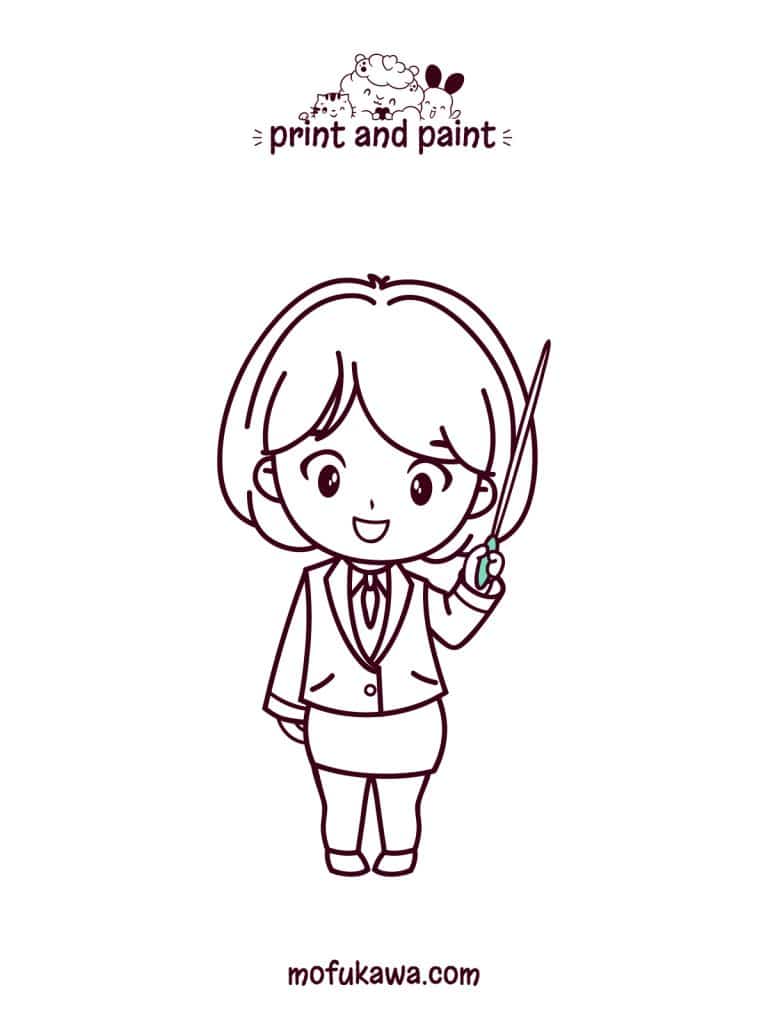
Just want to download a coloring page of this specific character? Click the print button below to print off this lesson’s coloring & tracing pages.

Printable Teacher Coloring Page

Here’s where you can download the teacher coloring page & step by step instructions. You can use the coloring page to practice coloring the character and the step by step instructions are great if you are not near a computer or phone and want to try this lesson out!

Click the print icon to open print options for these pages. You can also click the image and save it directly to your device.

Download Printable Teacher Coloring Page

teacher-coloring-page

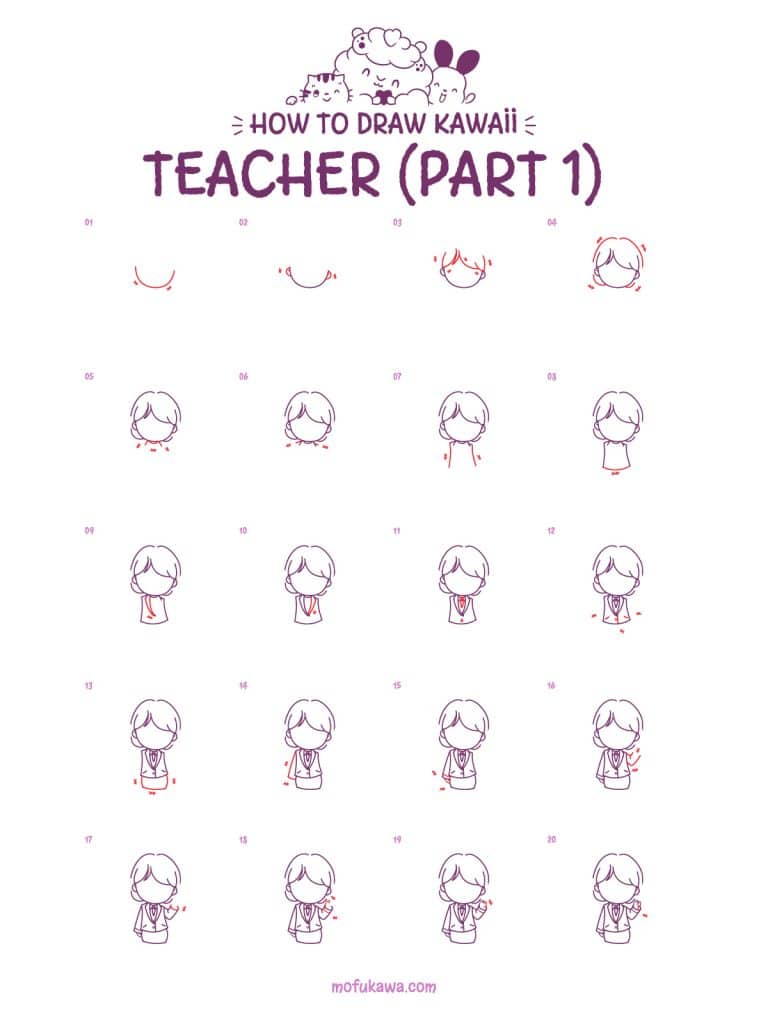
Download Printable Instructions: How To Draw A Teacher

Click To Print Instructions
howtodrawateacher-stepbystep-part1
howtodrawateacher-stepbystep-part2

Check us out on social media with the links below. 

Are you interested in coloring more?

Coloring characters such as this teacher can be A LOT of fun. Especially when they look so cute : )

If you had fun coloring this character, you may want to check out our kawaii coloring book which is available at Amazon. We also have some information on our site for more complex coloring for older kids and adults. You can check out our favorite adult coloring books and some of our top choices for color by number books for adults (which tend to be easier to start with).

Leave a Comment