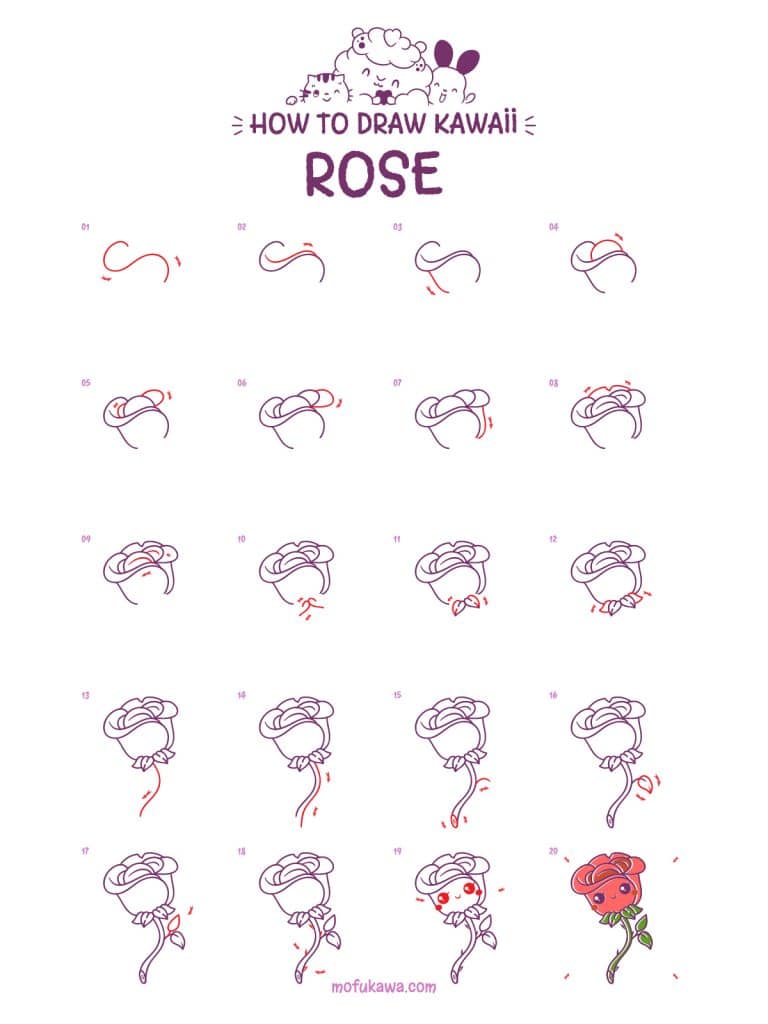
Today, let’s learn how to draw a rose, except with a twist. We’ll add on a kawaii face at the end. If you don’t want to add the face and only want to draw a rose, don’t worry. Just skip the last few steps and color it. It’ll still look great, we promise : )
The kawaii face just makes this rose look extra cute. You can also try drawing it along side our cute girl tutorial. If you haven’t checked it out and want to learn how to draw a cute girl, then be sure to check it out!
Grab your pen and paper and let’s get started.
Did You Know?
Roses are one of the oldest flowers.
Rose colors have different meanings.
There are over 100 different types (species) of roses!
Contents
Art Supplies
Here’s a list of coloring supplies we recommend to use, however, feel free to use whatever you can find around the house!
- Pencil, Marker, Sharpie, Pen (Anything you can draw with!)
- Paper (We love marker paper but use anything you can find).
- Colored Markers (if you want to color the drawing).
Here are what we think are the best colored pencils, best gel pens and best markers for coloring. - Your imagination (feel free to change colors or add things to the drawing!).
If you are already a fan of a particular marker/coloring brand you may want to check out a few of our other guides such for popular brands such as Ohuhu markers, Artzea and Prismacolor markers.
Otherwise, just pick whatever coloring tools you have around the house (crayons, markers, pencil crayons etc.) and just have some fun!
A Few Tips Before You Start Drawing
- Nothing too tricky but the petals are a lot of curves and swirls. The very first step looks like a side-ways “S”.
Let’s Draw A Rose – Step By Step


Note that they should be a little bit closer to the edges of the petals.


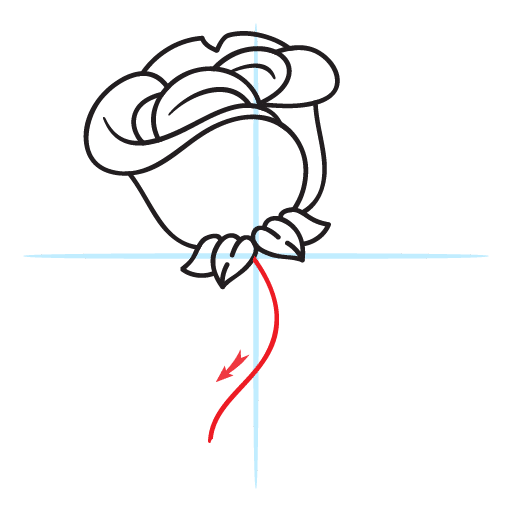
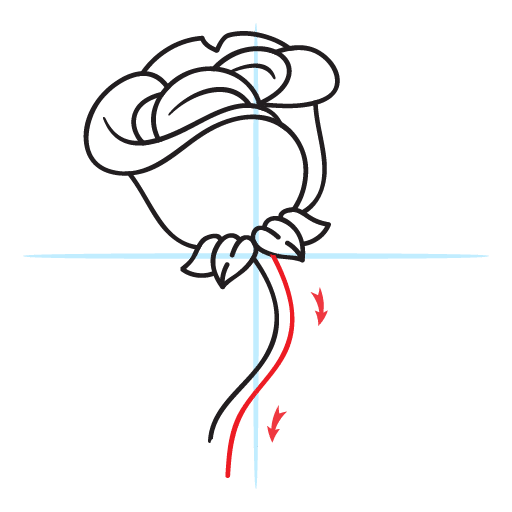

Let’s also start making the leaves by adding that curved line on the stem as guide.

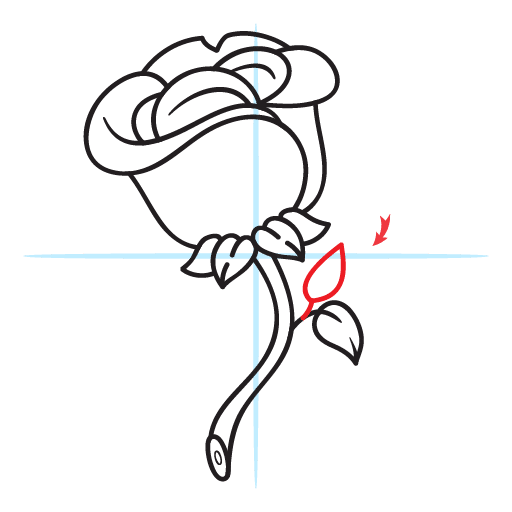
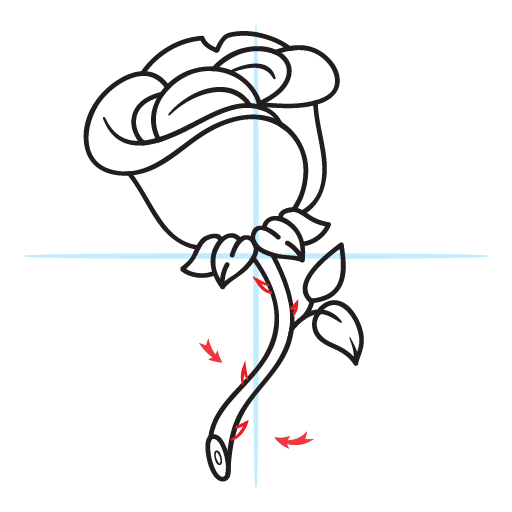

Make one stroke to on each side to make the eyelash.
Add a little smiley almost in between the two eyes.

Want More?
We are constantly adding more tutorials on how to draw kawaii characters and objects. Great for beginners and more advanced artists. We also have printable step by step instruction guides that will help, even brand new artists, re-create and improve on our drawings!
How about coloring instead? We have printable cute coloring pages so you can practice color techniques or just to have fun. Head on over to our coloring page section of our website to search and download them all!
Just want to download a coloring page of this specific character? Click the print button below to print off this lesson’s coloring & tracing pages.
Printable Rose Coloring Page
Here’s where you can download the rose coloring page & step by step instructions. You can use the coloring page to practice coloring the character and the step by step instructions are great if you are not near a computer or phone and want to try this lesson out!
Click the print icon to open print options for these pages. You can also click the image and save it directly to your device.
Check us out on social media with the links below.
Are you interested in coloring more?
Coloring characters such as this rose can be A LOT of fun. Especially when they look so cute : )
If you had fun coloring this character, you may want to check out our kawaii coloring book which is available at Amazon. We also have some information on our site for more complex coloring for older kids and adults. You can check out our favorite adult coloring books and some of our top choices for color by number books for adults (which tend to be easier to start with).




I’m trying to learn how to draw and this website has helped a lot