Today, let’s try drawing “Kitty” from Hello Kitty.
Hello Kitty is famous all over the world but started in Japan.
The Hello Kitty drawing style is very simple, not much detail but still very cute looking. This makes it great as an art lesson for kids and beginners.
Feel free to change it up a bit and color different parts any way you like!
Did You Know?
Hello Kitty is part of the Sanrio franchise that spans more than 21 different characters and art styles. It started out in Japan and is now known worldwide and can be seen on television, clothing, accessories and more.
Contents
Art Supplies
Here’s a list of supplies we recommend to use, however, feel free to use whatever you can find around the house!
- Pencil, Marker, Sharpie, Pen (Anything you can draw with!)
- Paper (We love marker paper but use anything you can find).
- Colored Markers (if you want to color the drawing).
A Few Tips Before You Start Drawing
- Kitty’s large red bow is one of her most well-known features. Try to keep it on the larger side and avoid making it too small.
- You don’t need to use the same colors as we do (you can if you want though) Experiment and see what you like best. That’s what makes this so much fun!
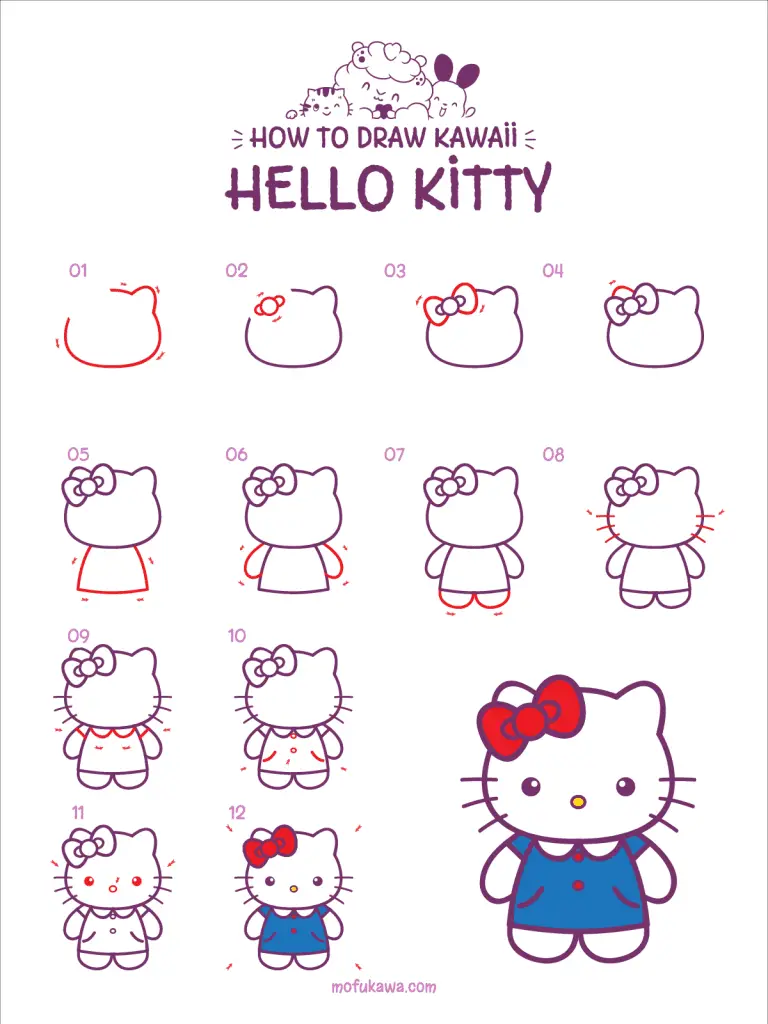
Let’s Draw Hello Kitty – Step By Step
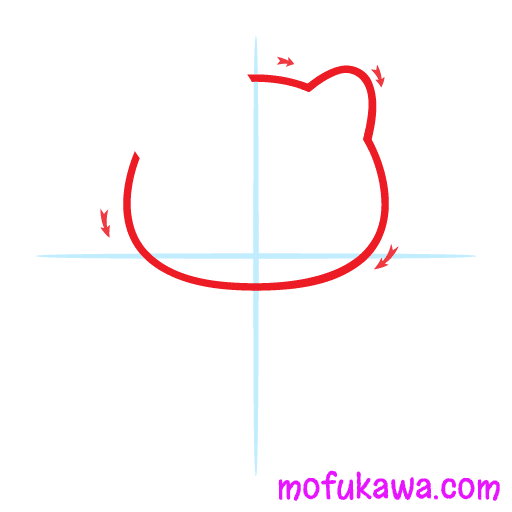
Step 1: Let’s start by drawing most of the head. We want to leave a bit of space in the top left for the bow that you’ll add over the next few steps.
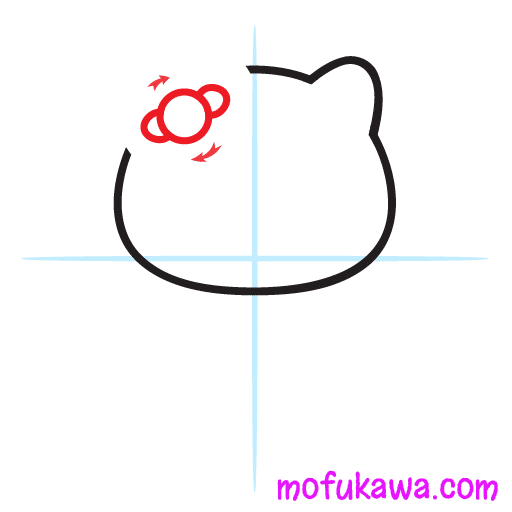
Step 2: Start by drawing a circle in the middle of the empty space in the top left corner of the head. Add 2 more half circles on the sides after.
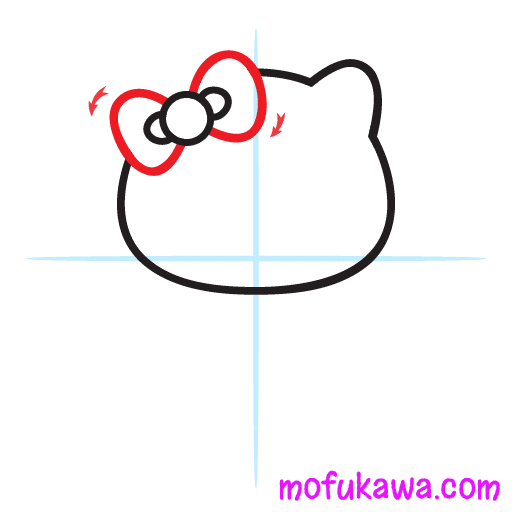
Step 3: Finish off the bow. Try to get the sides of the bow to touch the head lines.
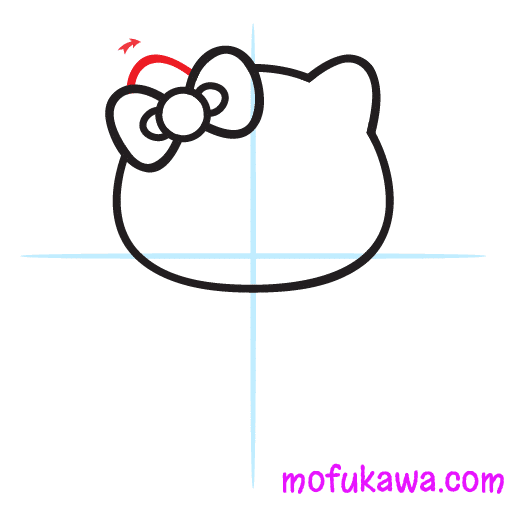
Step 4: Now that the bow is done, you can add the other ear above it.
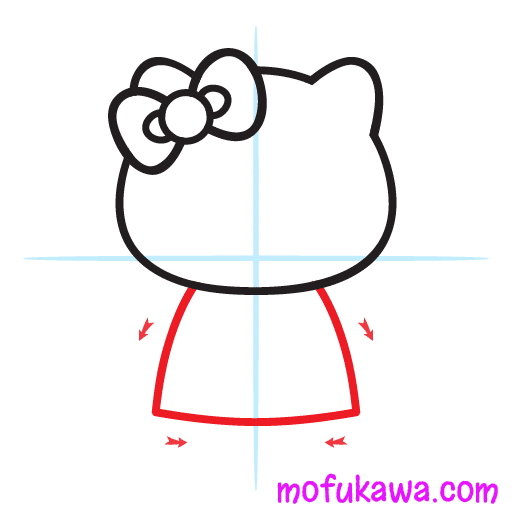
Step 5: Start the body next. Try to curve the lines outwards as they go down.
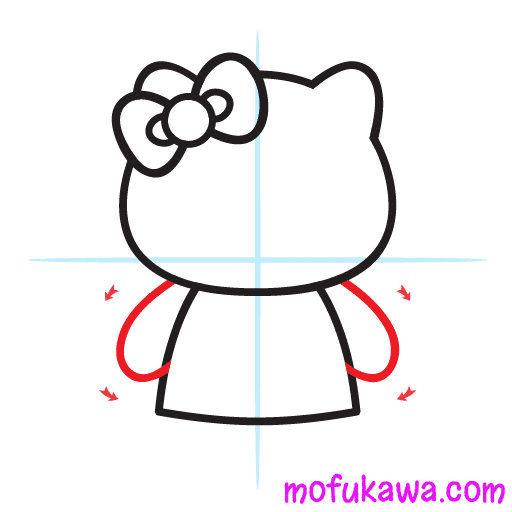
Step 6: Next, draw the arms on the sides of the body.
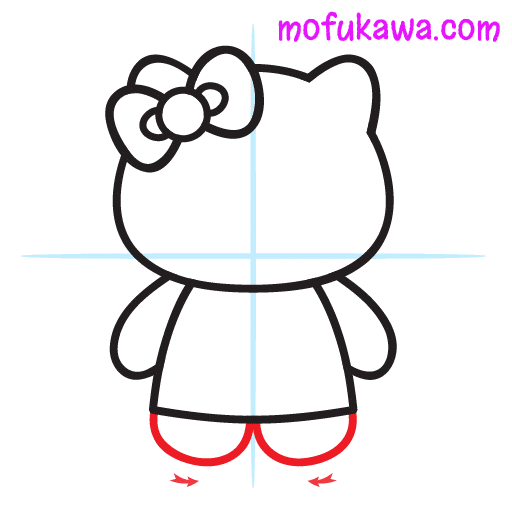
Step 7: Let’s do the feet next.
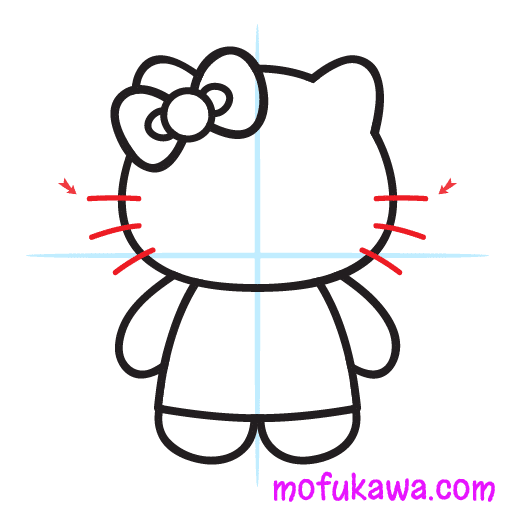
Step 8: Hello Kitty whiskers are not completely straight. They curve a bit downwards but very slightly.
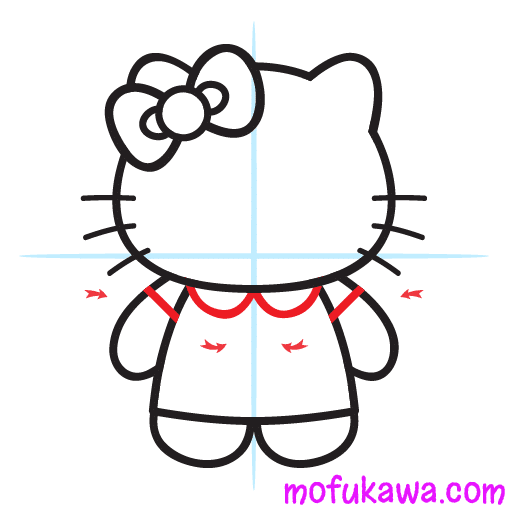
Step 9: Next let’s add a bit of line details to the clothing.
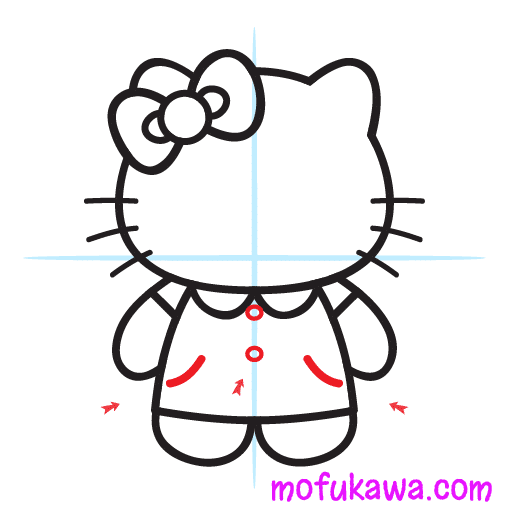
Step 10: A little bit more detail to the clothing. Don’t fill in the button circles; you’ll want to color the inside of them later.
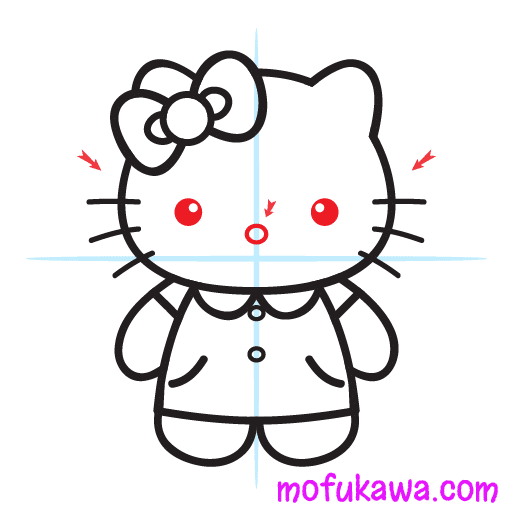
Step 11: Eyes and nose. Leave a small white circle in the eyes and don’t color the inside of the nose.
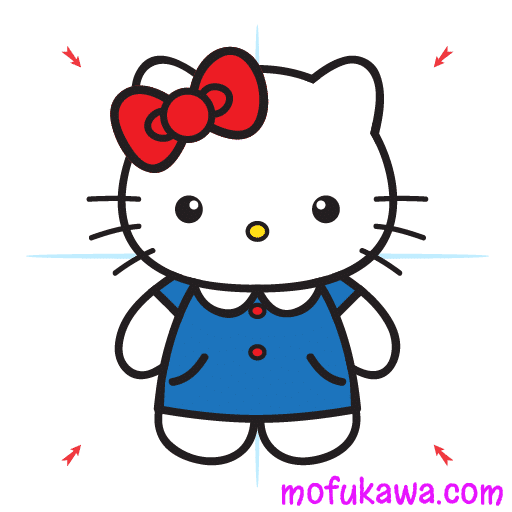
Step 12: All the lines are done, so you can start coloring. One of Kitty’s signature fashion features is her red bow, so we like to keep that red.
Great job on the drawing!
Want More?
We have printable coloring pages and printable step by step instruction guides to help you learn to draw. Head on over to our coloring page section of our website to search and download them all!
Just want to download a coloring page of this specific character? Click the print button below to print off this lesson’s coloring & tracing pages.
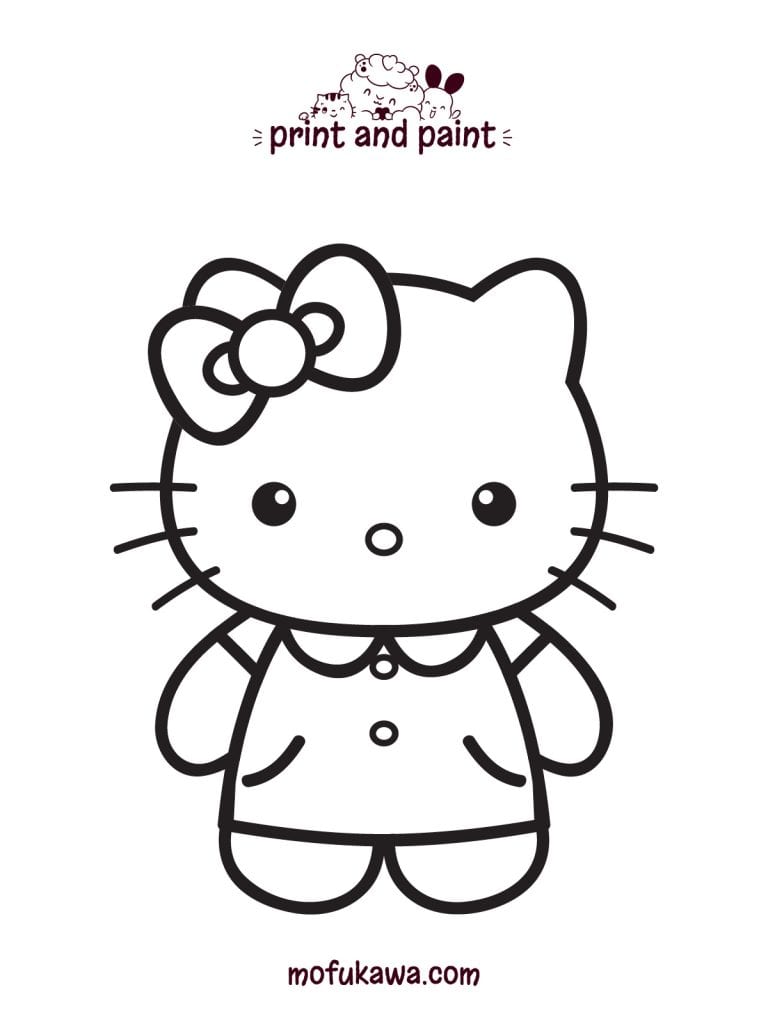
Printable Hello Kitty Coloring Page
Here’s where you can download the Hello Kitty coloring page and trace page. You can use the coloring page to practice coloring the character and the step by step instructions are great if you are not near a computer or phone and want to try this lesson out!
Click the print icon to open print options for these pages. You can also click the image and save it directly to your device.

