Art markers are tools used for drawing, writing, and coloring. It is a kind of pen that is filled with a colored pigment that is available in a wide range of colors and is so easy to use! It’s a great way to add color to your art projects and crafts.
There are a few different ways to use markers aside from writing words or letters. One way is to draw a line or other shape with the marker. This can be done by holding the marker at a slight angle and drawing the line with consistent pressure. Another way is by simply shading color in an area with the desired color to give you bold and solid colors. But, did you know that markers can give you more than that?

Contents
Why Blend?
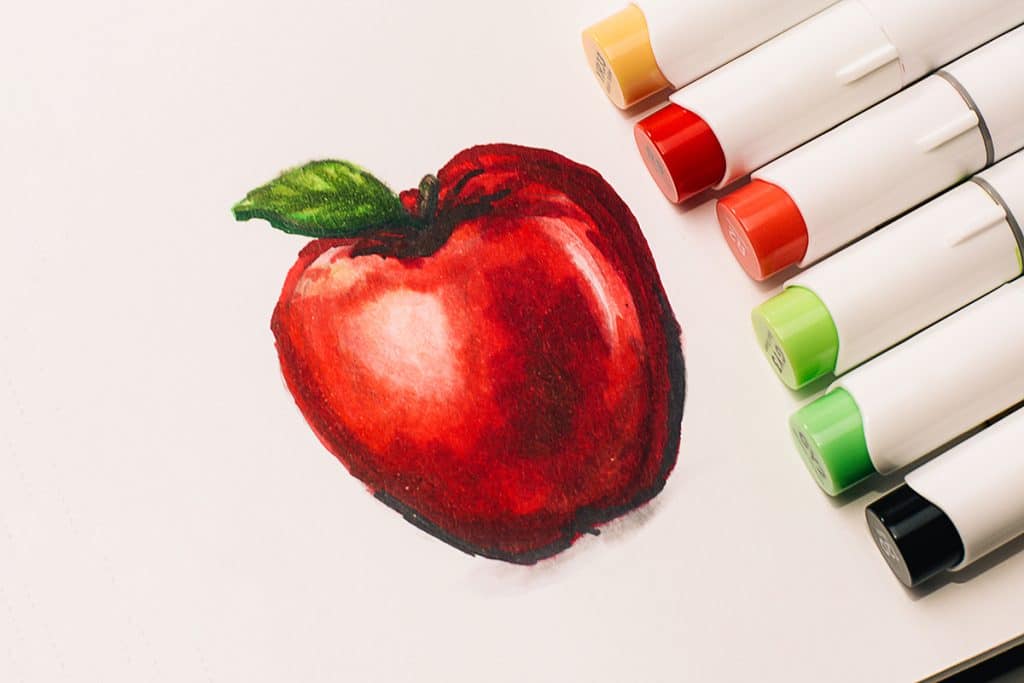
Markers are a great way to add color to your drawings, but they can be tricky to use. Blending markers can help you create smoother transitions between colors and make your drawing look more professional. It is a great way to create gradients and mix multiple colors and other effects with your markers.
Markers are often used by artists to add color to their drawings aside from writing on paper. Some markers are refillable, so you can use them over and over again. In blending, you tend to apply more layers of ink as you color; thus, refillable markers can be a great investment in the long run.
Markers also come with a variety of tips, including fine, medium, and broad tips. Fine tips are great for drawing detailed lines, while medium and broad tips can be used for coloring large areas. Depending on your need, these tips can be used to create thin or thick lines. Markers with brush nib are popular as well in blending due to their soft and bendable tips.
Markers and Papers for Blending
An important factor in blending is the type of marker you use. There are two common types of markers: alcohol-based and water-based.
Alcohol-Based Markers
There are a few reasons why alcohol markers are great for blending. They produce very little waste due to their highly pigmented inks. They have low odor and are non-toxic. Alcohol markers are offered in a variety of colors, making them ideal for making a smooth transition of colors and shadows. They are also easy to use and can provide consistent results.
Copic markers are widely considered to be the best alcohol markers for blending due to their high-quality nibs and refillable inks. Apart from that, they offer the widest range of colors. However, they are also the most expensive. If you’re on a budget, there are also great alternatives to a Copic marker set that you can try without breaking the bank. Popular favorites are Ohuhu markers and Prismacolor.

Water-Based Markers
Water-based markers come in a wide range of colors. They are great for blending because they are easily activated with water and blend well together. They are also non-toxic and have a minimal odor, making them ideal for use in classrooms and other settings where there are children or young artists present.
Marker Paper
There are a few things to consider when choosing the best marker paper for blending. The first is the type of paper you use. Blending markers work best on smooth, non-porous surfaces. This includes Bristol board, illustration board, and cardstock. Avoid using textured or rough papers, as this can make blending difficult.
The second consideration is the weight of the paper. Heavier weight papers are less likely to warp or bleed through when blending, making them ideal for blending markers.
Finally, consider the color of the paper. Light-colored papers will allow you to see your blending more easily, while dark-colored papers can create a more dramatic effect. Ultimately, it is up to you to decide what look you are going for. Adult coloring books are usually printed on paper that can be used for markers, so you can also enjoy blending.
Blending Techniques
Art markers can be blended together to create new colors. Blending markers is a process that can be done with a few materials – alcohol markers, special paper or your coloring piece, and probably a colorless blender – but requires skill to produce your desired blending results.
Here are some common techniques that you can try to explore with your alcohol markers. You can also check out this video for a demonstration. Practice the different blending techniques and learn to combine strokes. Explore what works best for you as you blend alcohol markers.
Basic Blending
Alcohol markers produce the best results when blending two or more colors together. Start by selecting two or more colors that are similar in hue. For example, choose a light red and dark orange if you want to blend red and orange. If you’re blending green and blue, choose a light green and a dark blue. Next, apply the lightest shade to your paper first. Then, add the next darkest tone over the top using a light touch. Continue adding colors until you’re satisfied with the result and have achieved smooth blending. This can also do well with chisel tips or bullet tips.
Feathering
The feathering technique blends two colors together by using a lighter touch with your markers. Gently lay down the first color in small strokes and then lightly layer the second color over the top. If you press too hard, the colors will start to mix together, and you won’t get the desired effect. This will create a softer edge on the markers and make them easier to blend. This is ideal for brush tip markers because you need to make flick strokes as you color your paper.
Nib to Nib
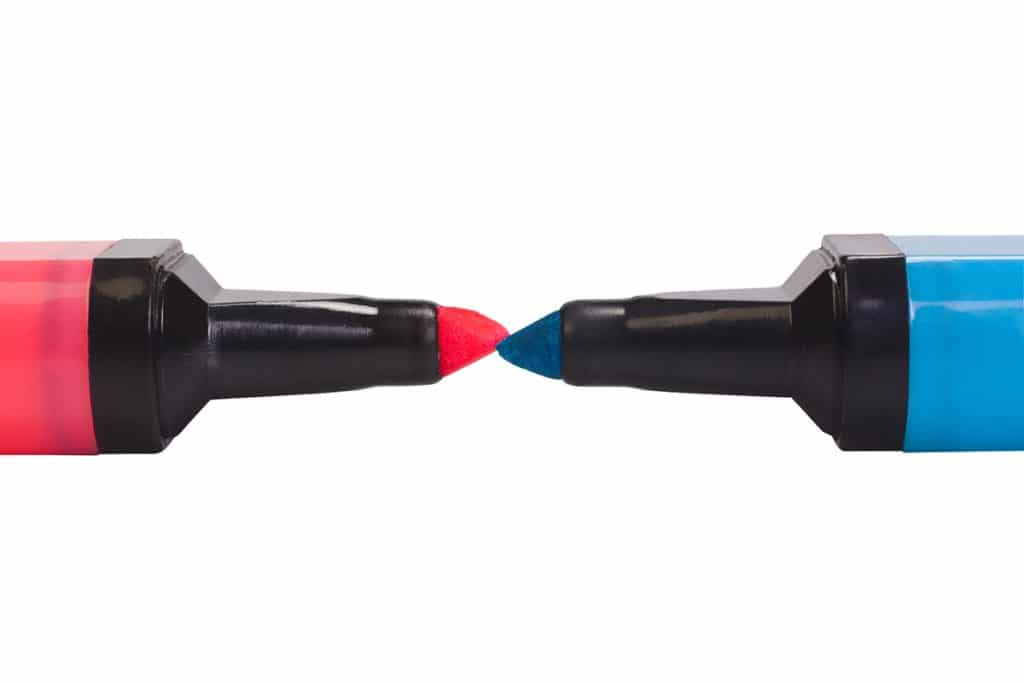
The nib-to-nib blending technique is a way of blending two colors together by touching the nibs of the markers together. This technique works best not only with a lighter alcohol marker but also for those who have limited markers on hand, as it can be difficult to achieve a smooth blend with dark colors or if you need a particular shade that is not available. To blend the colors together, start by touching the nibs of the markers together and then gently dragging them across the paper.
The goal is to create a smooth gradient from one color to the other. If you find that the colors are not blending well, you can try using a blending solution or a piece of scrap paper to help facilitate the blending process.

Swirling
The swirl blending technique blends markers together to create a cloudy-like effect on your paper. You will need two or more markers of different colors to do this. Make small swirl strokes starting with a dark tone, then add light shades in between while being consistent with the same stroke. Continue doing the same technique until all the colors are blended together. This is great for brush tips as the nibs can follow how you control your strokes. The layering of colors will come out nice and will not look patchy.
Dabbing
This blending technique is done by taking a small amount of ink on the tip of the marker and then dabbing it onto the paper. This will create a small dot of color that can be used to blend with other colors. This is great for doing gradients and if you want to add texture to your coloring project. To blend two or more colors together, start by dabbing one color next to the other color. Then, use a clean part of the marker to lightly blend the two colors together.
You can apply this technique when you need to add some dots and other details. Just keep on dabbing to make speckles as you layer and naturally blend the colors on your paper.
Using a Colorless Blender
A colorless blender is a type of marker that is used to blend colors together. These markers do not have any color of their own, but they are designed to help create a more blended look. Some marker sets, such as Ohuhu, already include one on their set. As for Copic, this can be bought separately.
To use a colorless blender, simply apply it to the area where you want to blend colors together. The colorless blender will help to create a more seamless appearance. Start with lighter shades and gradually add darker colors for best results. Overlapping colors slightly will also help to create a more natural look.
Blending Tips
There are a few things to keep in mind when blending markers. Here are some tips to keep in mind before you start:
- Markers are a great way to add color and detail to your drawings, but sometimes they can be tricky to blend. Use markers that are specifically made for blending. Some brands offer markers with special tips or ink that is designed for easy blending.
- Identify the markers you will use for blending. You may take note of your color codes so you can always have a reference for what you are using.
- When blending markers, it’s important to use a light touch. Applying too much pressure can damage the markers or make the colors muddy. If you’re having trouble getting the markers to blend, try using a different type of paper or experimenting with different techniques. With a little practice, you’ll be able to create smooth, professional-looking blended effects.
- Start blending by simply coloring over the edge of one color with another marker. The markers should slightly overlap each other so that both colors are visible. Slowly move the markers back and forth until the colors start to blend together. You can also use a cotton swab or your finger to help blend the colors together.
- When coloring in large areas, it’s best to use a light touch and build up the color gradually. This will help prevent the markers from getting too dry or becoming damaged. If you’re using markers with small tips, you may need to apply several layers of color to achieve the desired darkness.
- Start gently. If you press too hard, the ink will start to bleed, and the colors will not blend together as nicely. You can always add more ink if needed, but you cannot take any away once it is on the paper. So, it is better to start with less ink and build up the color gradually.
- Experiment with different techniques. Layer your colors. Start with the lightest color and build up to the darkest color. This will help you achieve a good blend with a more natural look. Some do it the other way around. There are many ways to blend markers, so find the one that works best for you.
- Practice on scrap paper before trying it on your final project. This will help you get a feel for how the markers blend and how much pressure to use. Using the right paper will also give you vibrant results that give a great impression.
- Be patient! Blending markers takes a bit of time and practice, so don’t be discouraged if your first attempt doesn’t turn out exactly as you hoped. It’s sure worth it when you see the final results. Just keep practicing, and you will eventually get the hang of it!
Conclusion
Markers are versatile tools that can be used for a variety of purposes. Whether you’re coloring in a picture or drawing a detailed illustration, markers can help you get the job done. With so many different colors and styles available, markers are also great for adding unique details to your work.
Blending markers is a great way to create new colors and add depth to your artwork. With a number of art markers available in the market, we have made a recommended list of the best markers for blending to help you decide which to try.
Try different techniques and see what works best for you! Happy blending!
